jekyll 블로그 tag 기능 추가
Intro
얼마 전에 추가했던 카테고리 기능만으로는 왠지 아쉬움이 있어 태그 기능을 추가하기로 했다. 지킬블로그는 모 하나 기능 붙이려면 여간 귀찮은 게 아니다. 관련하여 여러가지 글들을 읽어 보았지만 johngrib 님의 아래 글이 따라하기 가장 쉬웠던 것 같다.
https://johngrib.github.io/blog/2017/01/22/jekyll-category-tag
위 내용을 토대로 태그 기능을 추가한 과정을 공유한다
포스트에 태그 입력방법
글 작성시 front-matter 영역에 아래와 같이 tags 항목을 추가하면 된다
---
layout: post
title:  "[jekyll] tag 기능 추가"
date:   2018-08-11 01:00:00 +0900
categories: jekyll
tags: [jekyll, tags]
---
태그목록을 보여줄 화면 만들기
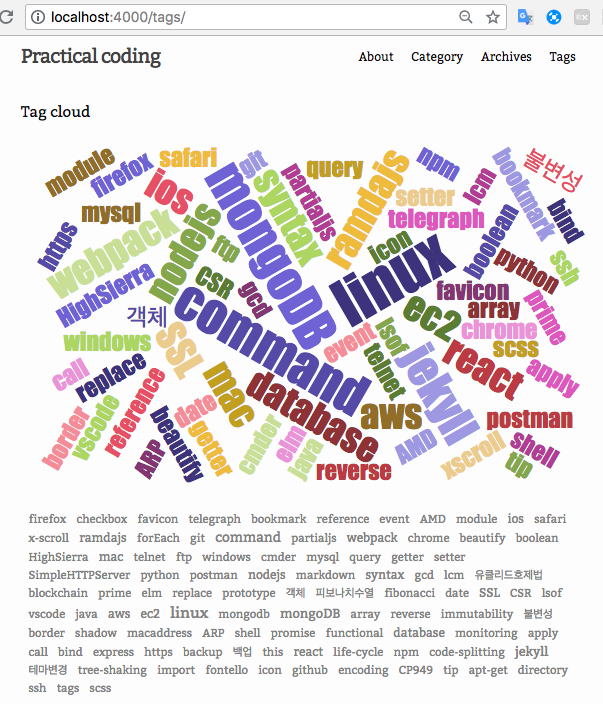
아래와 같은 모습으로 태그목록을 보여주는 화면을 만들 것이다
/tag.md
먼저 링크를 새로 따기 위해서 루트 경로에 tag.md 파일을 만들었다. layout으로 tag를 지정했기 때문에 /layout/tag.html 파일을 끌어올 것이다.
---
layout: tag
permalink: /tags/
title: Tags
---
/layout/tag.html
tag.html 에서는 전체 포스트에서 사용된 모든 태그의 목록을 보여줄 것이다. 11~13라인에서 땡겨오는 tag_cloud.html 은 필수요소는 아니지만. 태그클라우드를 이쁘게 보여주고 싶은 욕심에 추가해 보았다. 원치 않으면 제거해도 된다.
/includes/tag_cloud.html
태그클라우드 렌더링은 jasondavies 의 tag-cloud 소스를 이용했다. 아래 소스는 태그클라우드 demo화면의 소스를 일부 수정한 것이다.
/_sass/whiteglass/_layout.scss
태그클라우드와 태그목록의 스타일을 추가한다. 이 내용은 사용하는 블로그 스킨에 따라 추가하는 경로가 다를 수 있으니 적절한 곳에 추가하도록 한다.
/**
 * tag_cloud
 */
#presets a {
  border-left: solid #666 1px;
  padding: 0 10px;
}
#presets a.first {
  border-left: none;
}
#keyword {
  width: 300px;
}
#fetcher {
  width: 500px;
}
#keyword,
#go {
  font-size: 1.5em;
}
#text {
  width: 100%;
  height: 100px;
}
p.copy {
  font-size: small;
}
#form {
  font-size: small;
  position: relative;
}
hr {
  border: none;
  border-bottom: solid #ccc 1px;
}
a.active {
  text-decoration: none;
  color: #000;
  font-weight: bold;
  cursor: text;
}
#angles line,
#angles path,
#angles circle {
  stroke: #666;
}
#angles text {
  fill: #333;
}
#angles path.drag {
  fill: #666;
  cursor: move;
}
#angles {
  text-align: center;
  margin: 0 auto;
  width: 350px;
}
#angles input,
#max {
  width: 42px;
}

#vis {
  zoom: 0.8;
}

/**
 * tag_list
 */
.tag {
  .tagname {
    transition: all 0.1s ease-in-out;
    display: inline-block;
    margin-left: 10px;
    &:hover {
      transform: scale(1.1);
      -webkit-transform: scale(1.1);
    }
    a {
      color: $grey-color;
    }
  }
}
여기까지 작업이 완료되었으면 `http://localhost:4000/tags` 로 접근할 때 태그클라우드&태그목록 화면을 볼 수 있을 것이다. 이제 태그목록에서 태그명을 클릭하면 해당 태그를 가진 포스트 목록을 보여줄 화면을 만들 것이다. 위쪽의 태그클라우드(svg)에서도 태그를 클릭할 수 있으면 더 없이 좋겠지만 d3를 만질 수 있는 실력이 되지 않아 포기했다. OTL
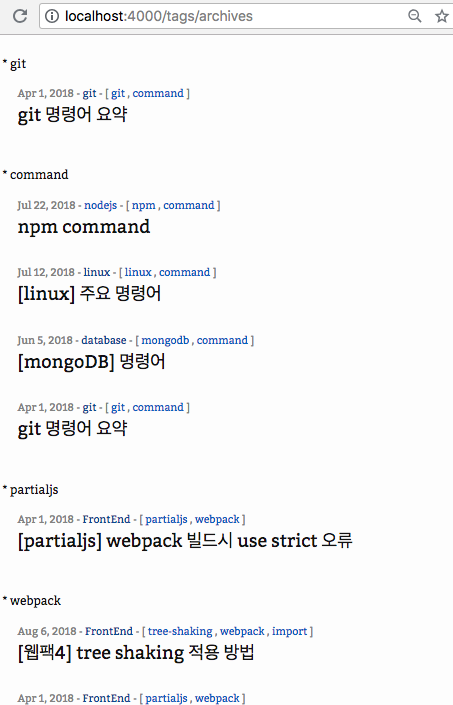
태그에 해당하는 포스트목록 화면
이제 아래와 같이 사이트의 전체 태그 별 포스트목록을 보여주는 화면을 만들 것이다.
/tag_archives.md
태그당 포스트목록 화면의 링크는 /tags/archives 로 정한다(물론 본인이 원하는데로 parmalink 값을 정해도 무관한다)
---
layout: tag_archives
permalink: /tags/archives
title: Tags
---
/layouts/tag_archives.html
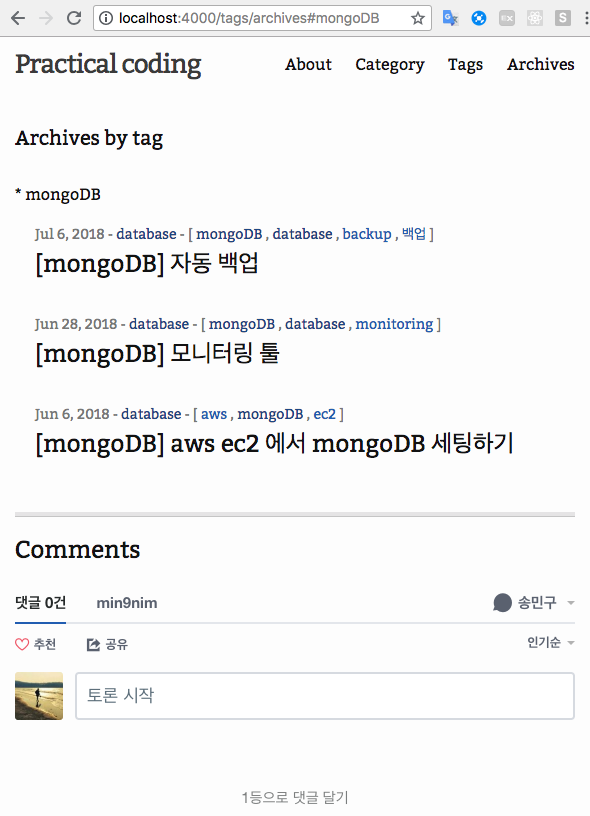
태그목록 화면에서(~/tags) 태그 클릭시 링크에 따라 해당 태그의 글목을 바로 보여주기 위하여 13라인의 div태그에 id를 태그명으로 각각 지정했음을 주목 해주기 바란다.
또는 아래와 같이 해당하는 태그의 글목록만 보여주는 것도 가능하다.
위와 같이 처리하려면 각 태그별 글항목 div를 모두 display: none; 으로 처리하되(아래 소스 12라인) 마지막에 스크립트를 이용하여(53라인) 현재 태그에 해당하는 항목만 display: block; 으로 처리한다.
글 내용에 태그 보여주기
앞서 front-matter에 지정한 tag를 글보기 화면에서 보여줄 필요가 있는데. 글보기 화면에서 필요한 부분에 아래 소스를 삽입한다
실행결과
{% if page.tags != empty %} [{% for tag in page.tags %} {{tag}} {% if forloop.index != page.tags.size %},{% endif %} {% endfor %}] {% endif %}
** 태그표시 끝 **
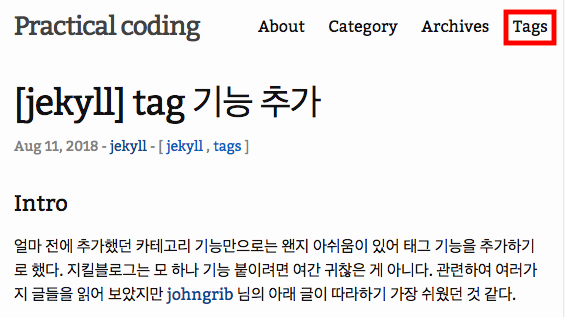
Tags 메뉴 추가
새롭게 추가되는 Tags 메뉴는
/_config.yml 설정에서 navigation 항목에 적절하게 추가한다